Para cultivar setas con éxito, deberá asegurarse de que está utilizando el sustrato correcto.
Usar sustrato para cultivar hongos es el equivalente a usar tierra para cultivar plantas. Es donde los hongos obtendrán todos sus nutrientes mientras crecen.
Al igual que las plantas requieren un suelo con diferentes propiedades, los diferentes tipos de hongos prefieren tipos específicos de sustratos.
Al final de esta guía, sabrás qué es un sustrato para hongos y para qué se utiliza. Conocerá algunas recetas comunes de sustratos de hongos y los sustratos preferidos de diferentes hongos. También te enseñaremos cómo pasteurizar o esterilizar el sustrato y mucho más.
¿Qué es un sustrato de hongos? ¿Para qué se utiliza?
Un sustrato para hongos es un material en el que el micelio de hongos puede crecer y establecerse. El sustrato proporciona a los hongos los nutrientes, la humedad y la energía que necesitan para crecer y fructificar.
Hay una variedad de diferentes sustratos que utilizan los cultivadores. Las diferentes especies de hongos tienen sus propias preferencias. Por lo tanto, es importante combinar los champiñones con el sustrato correcto para tener las mejores posibilidades de éxito.
¿Qué es un buen sustrato para hongos?
Un buen sustrato es denso en materiales leñosos y fibrosos como la lignina, la celulosa y la hemicelulosa. (Estos contienen una gran cantidad de carbono, que es la principal fuente de alimento para su micelio). Aquí hay algunas cosas importantes que debe tener en cuenta al elegir un sustrato:
- Su sustrato debe tener de 1 a 2 por ciento de nitrógeno. La mayoría de los sustratos (como el aserrín o la paja) necesitan que se les agreguen materiales adicionales para alcanzar este umbral.
- Tu sustrato debe contener una pequeña cantidad de magnesio, potasio, calcio, azufre y fósforo. La mayoría de los sustratos crudos ya contienen estos minerales, pero esto varía según el origen del material. Es probable que deba experimentar aquí para ver si necesita complementar con minerales adicionales.
- Tu sustrato debe ser ligeramente ácido, con un nivel de PH de aproximadamente 5 a 6,5. (Algunos hongos, como los hongos ostra, pueden tolerar un PH de hasta aproximadamente 8).
- Su sustrato debe tener una buena estructura para permitir el intercambio de aire. Esto es necesario para que el micelio colonice bien.
- Tu sustrato necesita un contenido de humedad del 50-70 %.
- . Finalmente, su sustrato debe tener una ausencia de organismos competidores. Esto proporciona un lienzo en blanco para que prospere el micelio de su hongo.
Preparación del sustrato
Antes de que se pueda inocular un sustrato con esporas de hongos o micelio, primero se debe preparar. Será necesario agregar agua al sustrato y es posible que también deba modificarse con nutrientes adicionales.
Una vez que está listo, el sustrato debe esterilizarse o pasteurizarse. Esto elimina cualquier moho o bacteria competidora y le da a la especie de hongo deseada la mejor oportunidad de arraigarse.
Si palabras como inoculación o micelio parecen abrumadoras en este momento, nuestro artículo ¿Cómo crecen las setas? Una explicación detallada le ayudará a ponerse al día.
El sustrato de hongos se puede colocar en una variedad de recipientes. Para los cultivadores comerciales, lo más común es empacar el sustrato en bolsas grandes de plástico transparente. Los cultivadores caseros pueden preparar frascos de sustrato para hongos, a partir de frascos de vidrio u otros recipientes pequeños, o empacar el sustrato en cubos.
Una vez que su sustrato esté pasteurizado o esterilizado y en su contenedor final, es hora de inocular con esporas o semillas de hongos para comenzar el proceso de crecimiento.
Sabrás que todo se ha hecho correctamente cuando empieces a ver signos de colonización, o el micelio del hongo creciendo y extendiéndose por todo el sustrato.
El micelio necesitará semanas o potencialmente meses para descomponer el sustrato y extenderse por completo. Una vez terminada por completo la colonización, todo el sustrato quedará cubierto de micelio. En ese momento está listo para dar frutos.
Para obtener más información sobre el resto del proceso de cultivo de hongos, consulte Cómo cultivar hongos:la guía definitiva .
Materiales de sustrato de hongos comunes (y recetas de sustrato de hongos)
Existe una amplia gama de materiales que puedes utilizar como sustrato para cultivar setas. Algunos son bastante convencionales, mientras que otros son un poco más nuevos y experimentales. Estos son algunos de los sustratos más comunes que utilizan actualmente los cultivadores de hongos.
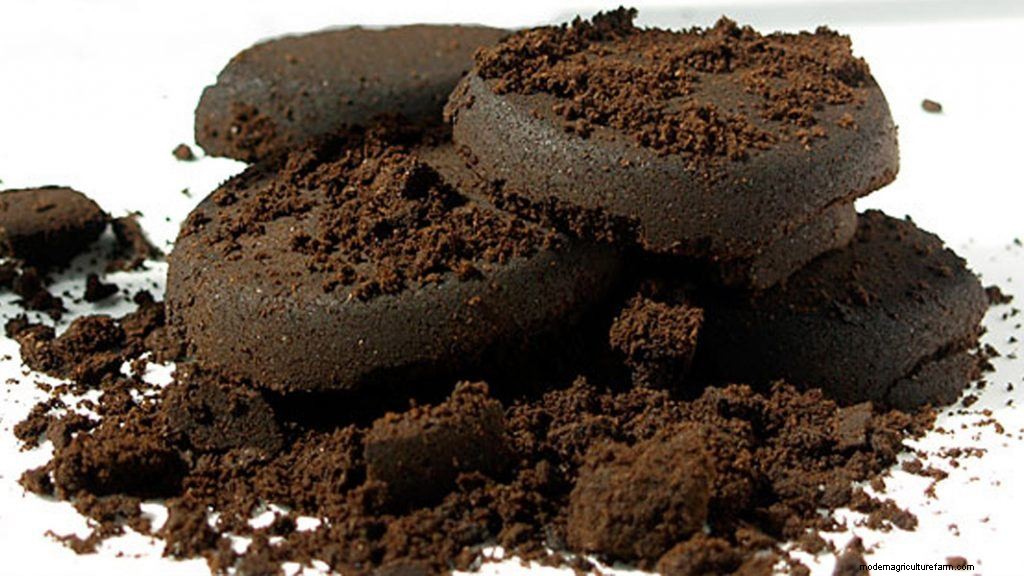
Café molido
Aquí en Grocycle, comenzamos cultivando en posos de café y lo hemos estado haciendo durante años desde entonces. Si se comunica con las cafeterías locales, a menudo guardarán los posos de café gastados y se los darán gratis.
Un gran beneficio es que el proceso de elaboración pasteuriza los granos y puedes comenzar a cultivarlos casi de inmediato.
La receta para cultivar en posos de café también es una de las más fáciles. Simplemente combine un kilo de café molido con 100 gramos de semilla de champiñón. Opcionalmente, puede agregar un 20 % de paja a su mezcla para un mejor intercambio de aire y una mayor velocidad de colonización.
Paja
La paja es otro material barato y efectivo para usar como sustrato. Se puede comprar en las tiendas de productos agrícolas o en la mayoría de los lugares donde puede encontrar alimentos para animales o ropa de cama. También puede experimentar con desechos agrícolas similares, como tallos de maíz.
Puedes cultivar en un sustrato compuesto 100 % de paja o agregar suplementos para proporcionar nutrientes adicionales.
Hay varios métodos que puedes usar para preparar el sustrato de paja. Muchos usan productos químicos como peróxido o hidróxido de calcio, o dependen de la fermentación de la paja durante una semana o más. Preferimos usar un método de calentamiento que sea rápido y orgánico.
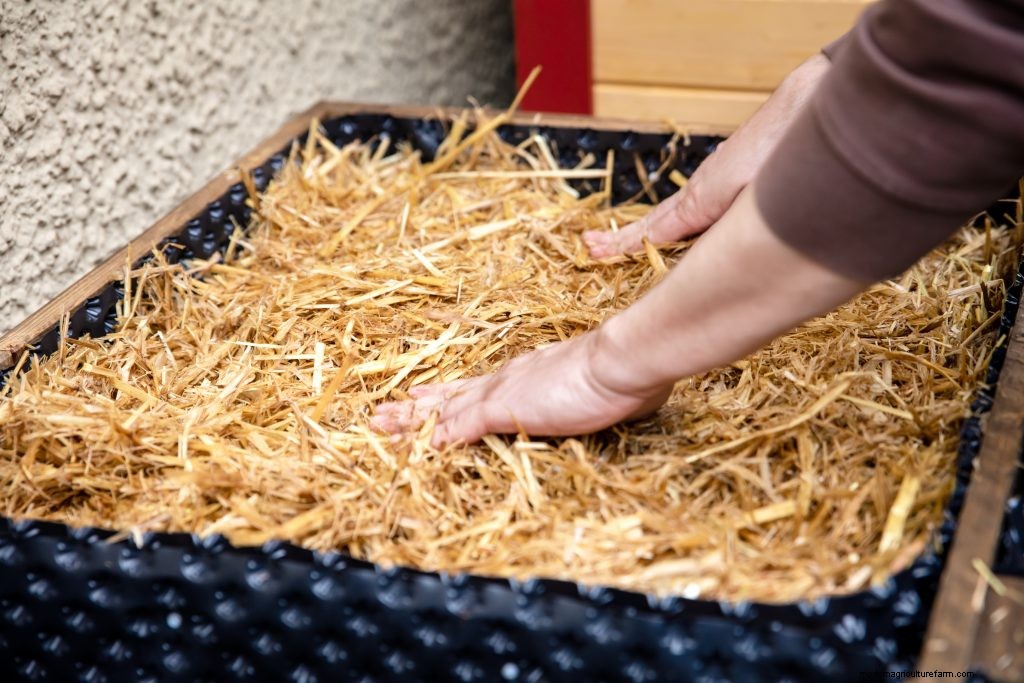
Comience cortando la pajilla en pedazos de tres o cuatro pulgadas. Si está trabajando con grandes cantidades de paja, puede ser más fácil usar un triturador de malezas en un contenedor de basura para triturar rápidamente el material.
Para pasteurizar la pajita, colóquela en una bolsa de lavandería o funda de almohada y sumérjala en agua a 160 grados F durante una hora. A pequeña escala, esto se puede hacer en el interior de una estufa. Para operaciones más grandes, use un tambor de 55 galones y un quemador de butano.
Una vez hecha la pajita, hay que escurrirla bien. Cuando exprimes un puñado de sustrato de cultivo de setas, solo deben salir unas gotas de agua. En ese momento, está listo para inocular con semilla de champiñón.
Coco y Vermiculita
La fibra de coco es un material hecho de cáscaras y cáscaras de coco molidas. Está disponible para la venta en la mayoría de las tiendas de jardinería. La vermiculita es un mineral de color marrón amarillento que se usa para retener la humedad y también está ampliamente disponible en los centros de jardinería de todo el mundo.
La mezcla de estos dos materiales puede crear un sustrato ideal para cultivar algunos tipos de hongos.
La mayoría de las recetas requieren una parte de fibra de coco y una parte de vermiculita.
Para un ladrillo estándar de fibra de coco seco (alrededor de 1,5 libras), agregue ocho tazas de vermiculita seca, junto con 16 tazas de agua hirviendo.
Remoje el material en un balde de cinco galones durante aproximadamente una hora. Luego mezcle todo, vuelva a colocar la tapa y deje que se enfríe durante cuatro horas antes de inocular.
Tenga en cuenta que la fibra de coco se expandirá de cinco a siete veces en volumen cuando agregue agua, por lo que terminará con mucho más sustrato de lo que parece inicialmente.
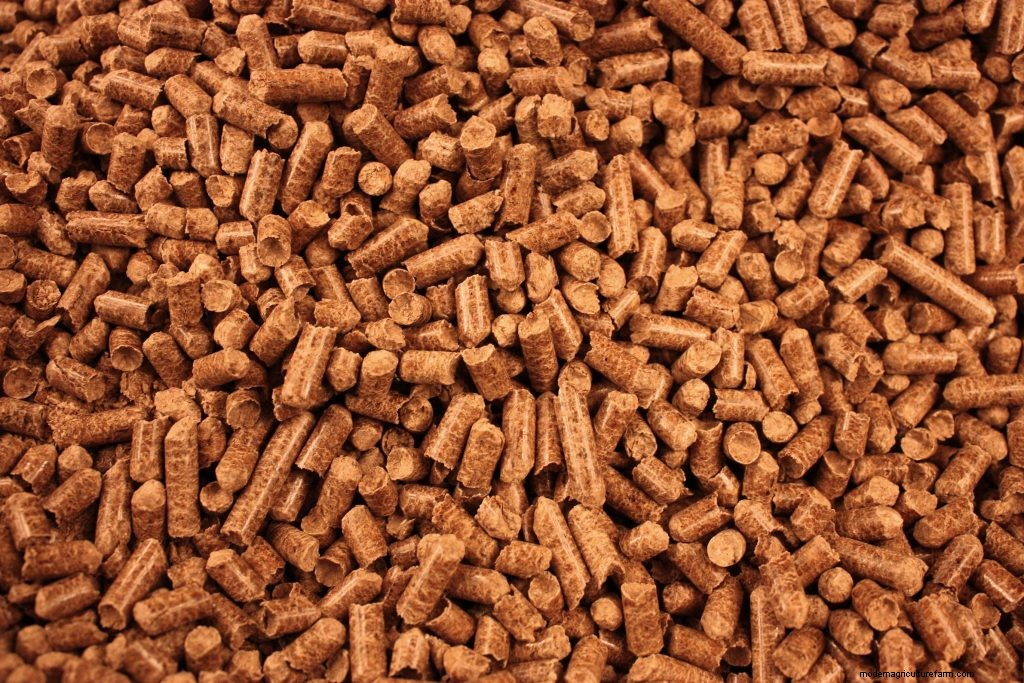
Pelets de madera dura
Todas las formas de maderas duras como el arce, el roble o la haya son un excelente sustrato para varios tipos de hongos. Solo evita usar aserrín o gránulos de árboles de madera blanda.
La gente usa pellets de madera dura para estufas y parrillas de pellets y la mayoría de las tiendas de madera dura los venden hoy en día. Son bastante económicos y en la mayoría de los lugares puedes encontrar una bolsa de 40 libras por $5.
No necesita los gránulos más caros hechos de maderas como nogal o manzana que se usan para ahumar carnes.
Para hacer un bloque de sustrato de 10 libras, necesitará 10 tazas de gránulos de madera dura y 2,8 litros de agua. Los gránulos de madera no necesitan esterilizarse, ya que el proceso de convertir el aserrín en gránulos significa que ya están esterilizados.
Sin embargo, la mayoría de los cultivadores complementan su aserrín de madera dura con salvado. Es posible que la madera por sí sola no tenga los nutrientes necesarios para cultivar algunos tipos de hongos.
Así que se pueden añadir 2 tazas y media de salvado de trigo o avena para aportar un extra de nutrientes al micelio. Agregar salvado significa que toda la mezcla debe pasteurizarse o esterilizarse.
Algunos agricultores también mezclan gránulos de madera dura con diferentes proporciones de cáscaras de soja para lograr un efecto similar. Esta combinación a menudo se denomina "mezcla maestra" y puede producir rendimientos impresionantes.
Estiércol
No creemos que el estiércol sea un medio de cultivo ideal por razones obvias. No querrás estar manipulando y calentando caca de animales regularmente. Sin embargo, para algunos tipos de champiñones, como los champiñones comunes, es necesario.
Puedes usar estiércol de caballo, pollo, vaca u otros tipos de estiércol para los champiñones. Las recetas generalmente requieren dos partes de estiércol con una parte de fibra de coco.
Luego se debe agregar agua para alcanzar la capacidad de campo. Esa es básicamente la cantidad de agua que el sustrato puede contener sin que se acumule agua adicional en el fondo. Si aprieta ligeramente, no debe salir agua y si aprieta con fuerza solo debe producir unas pocas gotas de agua.
Luego, toda la mezcla debe esterilizarse antes de que pueda inocularse con la semilla de hongos.
Registros
Sí, ¡incluso las piezas sólidas de madera pueden considerarse un sustrato! Los troncos se utilizan a menudo para cultivar shiitake y otras variedades de hongos al aire libre.
La mayoría de las variedades de árboles de madera dura pueden funcionar, incluidos haya, álamo, arce, roble, abedul, olmo y más.
Los troncos ideales para el cultivo de hongos miden de tres a cuatro pies de largo y de cuatro a seis pulgadas de diámetro.
No querrás usar madera que haya estado muerta o muriendo por un tiempo. Es posible que otros tipos de hongos ya hayan comenzado a colonizar la madera y pueden dificultar que se establezca el micelio deseado.
También se deben evitar los troncos recién cortados, ya que los árboles tienen propiedades naturales para prevenir hongos mientras aún están vivos. Lo mejor es almacenar los troncos recién cortados en un lugar limpio y seco durante unos meses antes de la inoculación.
Para inocular un tronco, se perforan agujeros de cuatro a seis pulgadas en las filas del tronco. Use una broca de 5/16 o 12 mm para obtener un tamaño de orificio óptimo. Las filas están escalonadas a dos o tres pulgadas de distancia entre sí.
El micelio se introduce en los agujeros mediante el uso de semilla de tapón. Estos son pequeños trozos de clavija de madera que se colonizan con micelio que se martillan en los agujeros. Luego, los agujeros se sellan con cera para evitar la contaminación.
Tenemos un artículo titulado Cómo cultivar hongos en troncos:la guía definitiva que analiza todo el proceso con más profundidad.
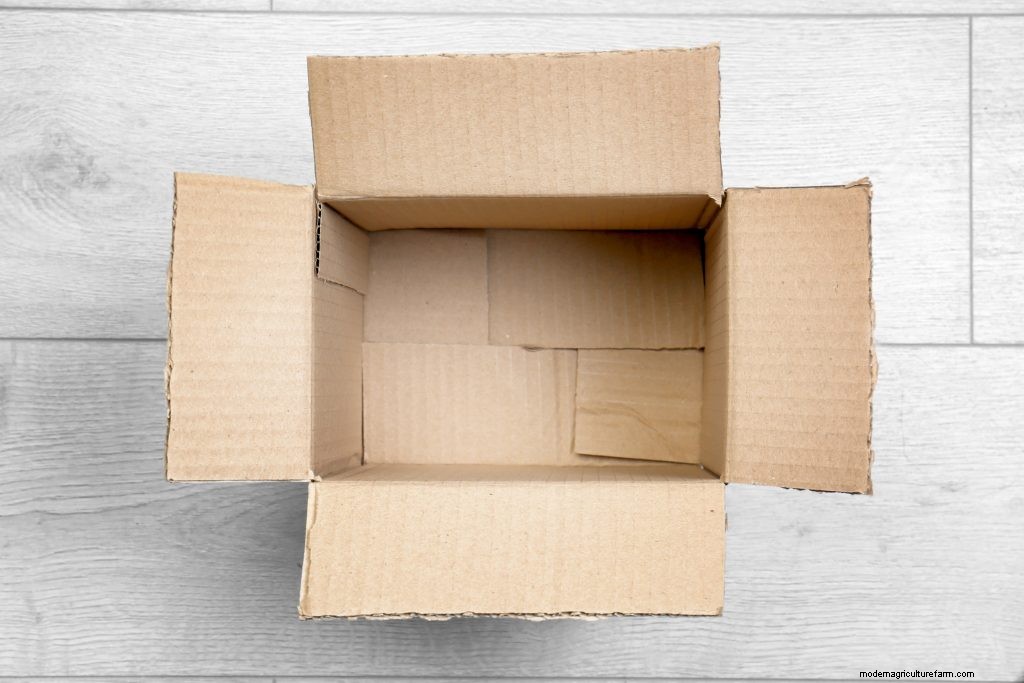
Cartón
El cartón es un buen sustrato para los principiantes que se inician en el cultivo de setas en casa. Es barato y fácil de encontrar. El cartón retiene bien la humedad mientras que las ondulaciones permiten un buen intercambio de aire.
Los hongos ostra y algunas otras especies agresivas crecerán solo en cartón, aunque es útil mezclarlos con café molido u otros suplementos para obtener mejores resultados.
Incluso puedes usar cartón para cultivar hongos a partir de los tallos de los hongos ostra que compras en la tienda de comestibles. Todo lo que necesitas hacer es colocar el hongo entre capas de cartón húmedo y el micelio comenzará a crecer.
Cultivar en cartón es tan simple que realmente no necesitas una receta. Simplemente recoja todo el cartón que quiera usar y luego sumérjalo en agua hirviendo.
Deje que su cartón se enfríe y exprima el exceso de agua y luego estará listo para agregar trozos de hongos para colonizarlo.
Algunos hongos incluso crecerán en papel. Intente cultivar hongos en un libro como una forma divertida y educativa de enseñar a los niños acerca de los hongos.
Cómo pasteurizar o esterilizar sustratos de hongos
Además de seleccionar un sustrato para usar, decidir cuándo es apropiado pasteurizar o esterilizar el material es otra parte importante para aprender a hacer sustrato para champiñones.
Algunas personas tienen configuraciones de cultivo de hongos muy complicadas que involucran salas limpias con presión de aire negativa y equipos costosos.
Sin embargo, hemos descubierto que esto hace que el proceso sea mucho más complicado de lo que debería ser, sin un beneficio significativo. Así que optamos por un estilo de cultivo más Low Tech Mushroom Farm.
Consulte nuestro artículo Cómo configurar una granja de hongos de baja tecnología para obtener una guía completa.
Descubrimos que siempre que siga los procedimientos básicos para la esterilización o pasteurización de sus sustratos de champiñones, la posibilidad de contaminación es muy baja.
Mantener las superficies limpias y limpiarlas con alcohol isopropílico al 70 % durante la inoculación es todo lo que necesitan la mayoría de los productores.
¿Cuál es la diferencia entre pasteurizar o esterilizar un sustrato?
Tanto la pasteurización como la esterilización del sustrato implican calentar el sustrato en un intento de destruir las bacterias u hongos existentes, pero la pasteurización calienta el sustrato hasta 185 grados F, mientras que la esterilización expone el sustrato a temperaturas superiores a 250 grados F.
Sigue leyendo para conocer más diferencias.
Cómo pasteurizar sustrato de hongos
El propósito de la pasteurización es conseguir que el sustrato esté bastante libre de contaminantes y le da a cualquier cultivo de hongos que introduzca una buena ventaja. Hay dos formas de pasteurizar:
Pasteurización por baño de agua caliente
Una forma de pasteurizar el sustrato es simplemente sumergirlo en agua hirviendo durante al menos una o dos horas. Para la mayoría de las operaciones, hemos descubierto que la pasteurización es suficiente para cultivar hongos con un riesgo mínimo de contaminación.
Cold Water Lime Pasteurization
To do this method, soak your substrate in a bath of hydrated lime-treated cold water for 24 hours. This increases the pH of the water, killing contaminants in the process.
How To Sterilize Mushroom Substrate
Sterilization involves exposing the substrate to temperatures higher than 250 degrees F and also involves placing the substrate under pressure. Sterilization aims to completely eliminate all contaminants that might be in the substrate, both living and currently dormant.
Simply boiling a substrate doesn’t get it hot enough to completely sterilize. For full sterilization, a pressure cooker or similar piece of equipment is needed.
How To Sterilize Mushroom Substrate Without A Pressure Cooker
There are a few ways that you can sterilize a substrate without using a pressure cooker.
A process called tyndallization or fractional sterilization can also be used. This is accomplished by boiling jars or bags for a certain length of time over several days in a row.
The purpose of this is to kill both any microbial life that currently exists in the substrate, as well as any spores that may take a few days before they begin to grow.
Anything that gets your substrate above 250 degrees F for an extended period of time can sterilize. This includes putting your substrate in an oven or autoclave.
However the problem with this is that it cooks your substrate and will completely dry it out. Some substrates may also start to burn. If you sterilize your substrate this way, you’ll need to use distilled water to rehydrate it afterward while still keeping it sterile.
Why Is Pasteurization or Sterilization Necessary?
Pasteurization or sterilization reduce mold and bacteria and help ensure that the thing you’re trying to grow will have the best chance to get established.
The substrates that mushrooms like to grow in are very moist and full of lots of nutrition. While that’s an ideal environment for mushrooms, it’s also the ideal conditions for other things like mold and bacteria to grow.
Bacteria and mold can grow faster than mushroom mycelium can. If left to nature, these contaminants will outperform mycelium and take control of the substrate before mushrooms have a chance to get established in most cases.
So we need to do something to give mushrooms a bit of a head-start and ensure they colonize the substrate before other forms of mold or fungi can.
Pasteurizing your mushroom growing substrate is the equivalent of pulling as many weeds as you can out of the garden before planting vegetables. Sterilization is more like scorching the earth and killing every living plant and seed in it.
Do You Have To Sterilize Mushroom Substrate?
For some varieties of mushroom substrate, sterilizing is necessary to avoid contamination. For other kinds of substrate you can get by with only pasteurizing it.
The most important factor in whether you need to sterilize or pasteurize is the nutrition content of the substrate.
Manure is a perfect example of a substrate that should always be sterilized. By its very nature, it’s already teeming full of bacteria and microbial life.
It might not seem like a very appealing habitat to humans. But since it’s made of partially-digested food, it makes an easy food source for all kinds of different lifeforms.
Any substrate materials that could be considered food items need to be sterilized for similar reasons. This includes rye grain, popcorn, brown rice and wheat berries.
These substrates are all rich in nutrients and all kinds of different fungi and mold like to grow on them. You’ve probably observed in your own kitchen how mold will start to grow on food after just a week or two.
High-nutrient substrates need to be sterilized to give the mushrooms you’re growing a head start.
Less nutritious substrates can be pasteurized instead of sterilized. A good example of this is straw. Straw is the dried stalks of various grain plants after all of the grain has been removed.
While it still has some nutrients left in it, it’s not as nutrient-rich as grains themselves.
Coco coir, logs and cardboard similarly don’t need to be sterilized. Pasteurization is enough to remove most of your mushroom’s competition and give it a head start.
If you come across a new substrate that we haven’t discussed here, just ask yourself one question to see if it’s a material that should be pasteurized or sterilized. Is this something that a wild animal would eat?
Things like vermiculite and straw aren’t an appealing food source for farm animals or even rodents. Meanwhile animals and even humans will eat grains because they’re full of nutrition.
One thing to watch out for is when mixing substrates, also known as supplementing them. You may add a more nutritious substrate to another to make it more nutritious.
For example, adding manure to hardwood sawdust. Hardwood pellets or sawdust wouldn’t normally need to be sterilized. But once you supplement it with another material that makes it easier for mold or bacteria to grow, sterilization becomes necessary.
If you’re in doubt, you can sterilize any substrate to be extra safe. It just requires additional labor and equipment.
Fermentation of Straw as an Alternative to Pasteurizing

One thing mushroom growers can do instead of pasteurizing straw is to ferment it.
This involves submerging a bag full of straw underwater for about a week. If you’re fermenting a whole straw bale you’ll probably need to submerge it for longer, about two weeks.
During this time, the straw starts to be broken down (fermented) by anaerobic organisms. These are types of bacteria that can only survive in environments without oxygen.
As a result, all other organisms that normally require oxygen to survive are killed off. Once the wet straw is drained exposed to air again, all the anaerobic organisms are killed and the straw is essentially pasteurized.
One reason that we prefer to pasteurize instead of ferment is that this technique quite literally stinks. Think about the process of fermenting foods like sauerkraut, kimchi or kombucha.
This is basically the same process but involving straw. If you use this method, you’ll want to avoid getting any of the water on your hands or clothes. The smell is very difficult to get off.
The other downside to fermenting instead of pasteurizing is the time and planning required. When you’re fermenting, you’ll need to predict what your substrate needs will be a week or more out. If you’re pasteurizing, your substrate can be ready to use in just a few hours.
How Do You Mix A Mushroom Substrate?
There’s no easier way to mix substrate than simply mixing it up with your hands. Of course, be sure to wash your hands thoroughly before you begin and consider wearing a pair of disposable gloves.
For bigger batches you can use a large spoon or even a shovel depending on how much substrate you’re working with. You can also use a compost tumbler which is what we use here at GroCyle), or you can use a commercial substrate mixer.
Which Substrates Are Best For Which Types of Mushrooms?
As we’ve alluded to throughout this guide, different kinds of substrates are best suited to different mushroom species.
If you’re asking yourself “What is the best mushroom substrate?” Unfortunately we don’t have one catch-all answer that applies to every situation. If it was that easy, every mushroom grower would just be using one ultimate substrate!
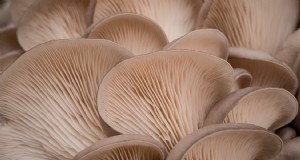
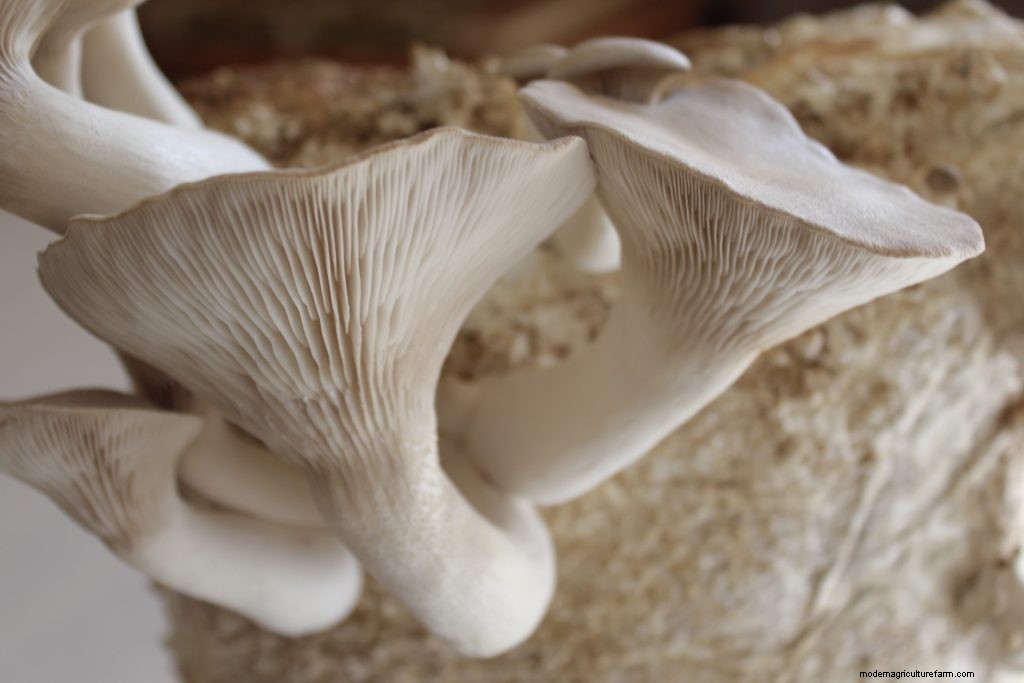
Some species of mushrooms like oyster mushrooms are very aggressive and can colonize a wide variety of materials. Others prefer wood-based substrates.
Some varieties of fungi like truffles even prefer to grow on the roots of living trees, which makes them notoriously difficult to grow in a commercial setting.
Choosing Your Substrate
Choosing your substrate comes down to a few choices:
- How much time and money do you want to put into growing mushrooms? If you want to keep your time and money input low, look toward pasteurized substrates, not supplementing them, and choosing the species that grow well on those substrates.
- This is our approach at GroCycle and it scales up very well.
If you want to grow a wide range of gourmet mushrooms on a commercial scale and are okay with investing more time and money, look toward supplemented materials and having a method to steam and sterilize the materials.
That will enable you to branch out into many types of mushrooms.
- What substrate is available to you? Logically, you’ll want to choose a substrate that’s available to you locally. For instance, if straw isn’t abundant where you live, you may try coco coir.
Low Tech Mushroom Substrate
If you do choose to go the low tech route to grow you mushrooms, good substrate options include straw, straw pellets, sawdust pellets, sugar cane mulch, and coffee grounds. We’ll explore several of these in more detail below.
Straw
Straw isn’t very nutritious, so it’s not well suited for all varieties of mushrooms. However it can be quite effective for growing oyster mushroom species.
Other species of mushrooms that can grow on straw include agaricus species, wine cap (also known as garden giant), shaggy mane and enoki.

Logs or Sawdust
There are a wide variety of edible and medicinal wood-loving mushrooms. These include shiitake, maitake, turkey tail, lion’s mane and reishi. Some types of oyster mushrooms will also grow well on wood. Particularly king oyster mushrooms, which prefer wood over straw as a substrate.
Most mushrooms that grow well on logs will also grow on hardwood sawdust pellets or vice versa, since both are wood-based substrates.
Remember that if you’re using logs, you’ll want them to be fairly fresh cut. Logs that are already dead or rotting may be home to wild fungi and molds already.
Logs don’t need to be sterilized before use. But keep in mind that since they’re a more natural mushroom growing substrate material, they may be home to other species of fungus that could produce poisonous mushrooms. Esto es raro.
But make sure that you know how to identify the species of mushroom that you’re growing and take care that other types aren’t mixed in by mistake.
Supplemented Sawdust
If you’d like to grow a wider range of mushrooms on sterilized substrate, try a supplemented sawdust mix of 60% hardwood sawdust, 20% wood chips, 18% bran and 2% gypsum.
Masters Mix
Masters Mix, developed at Earth Angel Mushrooms is another simple substrate option that consists of 50% hardwood pellets and 50% soybean pellets. It tends to result in very good yields, but needs to be sterilized.
If you’re in the United States, you can buy bags of this already made from Mushroom Media Online.
Manure
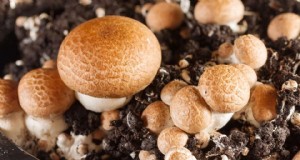
You might think that manure would be an ideal growing medium for mushrooms. However most species of edible mushrooms don’t actually like it. The main exceptions are button, crimini, and portobello mushrooms.
These are actually all the same species of mushroom at different life stages.
Coffee Grounds
We only recommend growing oyster mushrooms on coffee grounds. This is a tried and tested combination.
A few other species of mushrooms like shiitake may grow on coffee grounds as well, but might not produce as good of a harvest compared to growing on hardwood.
Mixes
Some materials like vermiculite have no nutritional value on their own. However they may be mixed with other materials like coco coir or grain to provide better moisture retention or other qualities.
Experimenting with different substrate mixes is something that you can try once you’ve been growing mushrooms for a while.
However when you’re just learning how to make mushroom substrate, we recommend sticking with a single substrate to begin with until you can produce a consistent harvest.
Supplementing Your Substrate
If you’re thinking of growing mushrooms commercially, you may want to supplement your substrate to increase the yield of mushrooms. Most commonly, supplement materials are bran or seed derivatives.
Or, you can get them in pellet form as high-protein animal feed. The latter is preferably since it’s already pasteurized.
You’ll need to experiment to see how much supplementation to add, and the amount will also depend on whether the material you’re adding is sterilized. We recommend starting at 5% and working your way up.
What To Do With Spent Mushroom Substrate
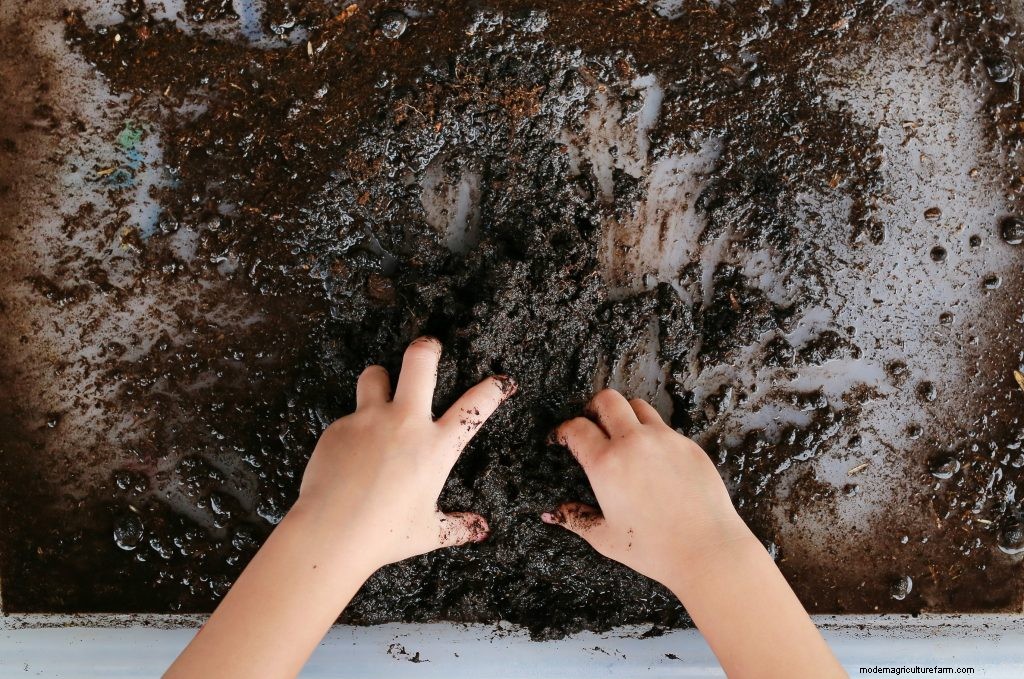
If you’ve been growing mushrooms for any length of time, you’ll soon end up with big piles of spent substrate. This might leave you asking yourself “What can I do with an old mushroom substrate?” The most common choice for mushroom growers is to compost it.
It can be mixed into an existing compost pile. Or you can create a compost pile out of just used substrate that will naturally decompose and break down into a rich compost over time.
If you’ve got a garden, you can even mix the used substrate right into the soil.
Some large commercial growers will even process their mushroom substrate and sell it as compost to home gardeners.
If you’re lucky, you may get a few extra flushes of mushrooms from your compost pile or garden. Some species like oyster mushrooms can even take hold and spread and you’ll get free mushrooms growing in your garden year after year.
Some of your spent substrate can also be used to inoculate a new batch of substrate. That way you won’t need to buy mushroom spawn from suppliers and can have a truly self-sufficient operation. This kind of Low Tech Mushroom Farm may lead to slightly higher incidents of contamination though.
If you’re a farmer with lots of space then it’s easy to dispose of used substrate on your own. But what about people who are growing mushrooms in the city?
Nowadays many cities have a free composting program. You may be able to dispose of the used substrate in compost bins that get emptied each week.
Or you may need to drive the used substrate to a city depot that handles yard waste, compost and other recyclables to drop it off yourself.
If your city doesn’t offer any way to recycle your substrate, you can reach out to nearby farmers. They may want to add your used substrate to their own compost piles and will let you drop it off for free.
There have even been studies on using mushroom substrates as an ingredient in feed mixes for chickens and cattle.
Reflexiones finales
Selecting the right substrate and preparing it correctly for the specific type of mushroom that you’re growing is critical for your success.
Some species like oyster mushrooms can grow on a wide range of substrates including straw or even cardboard. Other species are more particular and will only produce high yields when grown on a specific substrate.
Once you’ve selected the correct substrate you’ll need to either pasteurize or sterilize it to minimize the risk of mold and bacteria growth. This part of the process helps give your mycelium a head-start in getting established.
After your mushrooms are done fruiting, you can dispose of spent substrate by composting it.
Now you know how to create an ideal substrate for your mushrooms. It’s time to get growing!